You can optimize your WordPress website using various WordPress shortcuts. These valuable shortcuts can save you precious time and improve your productivity considerably.
This blog post explains several WordPress shortcuts that can help you accelerate your website management process. Moreover, it allows WordPress users to utilize multiple keyboard shortcuts for Gutenberg and Classic WordPress editors.
WordPress Shortcuts for WordPress Editor

WordPress users can benefit from various keyboard shortcuts when creating top-notch content using the WordPress editor. This way, they can save time and effort, maximizing their productivity to the next level.
Windows Keyboard Shortcuts for Selecting Text

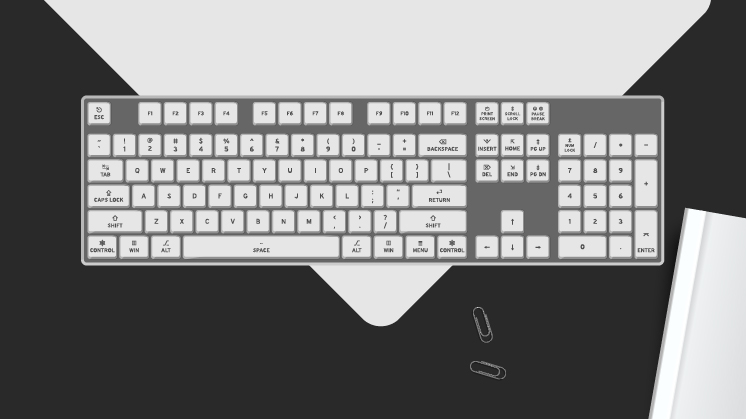
Here are numerous WordPress keyboard shortcuts allowing you to select text in the WordPress editor. These WordPress shortcuts are explained below:
- CTRL + A – (Choose all text).
- Shift + Left/Right – (Choose one letter to the right/left).
- CTRL + Shift + Right/Left – (Choose one word to the right/left).
- CTRL + Shift + Up/Down – (Choose one line above/below).
- Shift + Home – (Choose all text until the beginning of the current line).
- Shift + End – (Choose all text until the end of the current line).
Mac Keyboard Shortcuts for Selecting Text

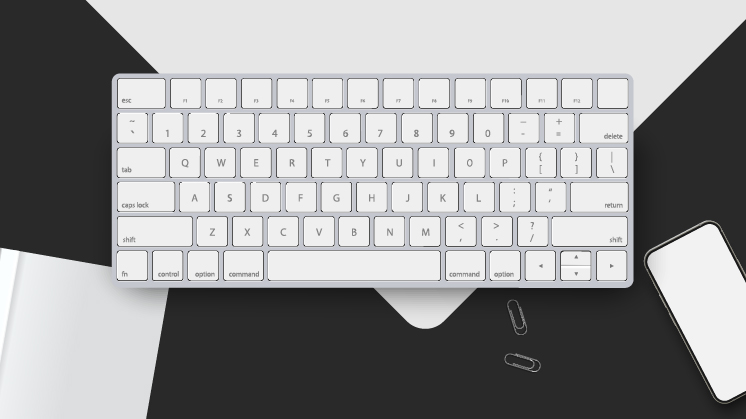
The Mac shortcuts would help users choose text using the editor without leaving their keyboards:
- Cmd + A – (Choose all text).
- Shift + Left/Right – (Choose one letter to the right/left).
- Cmd + Shift + Right/Left – (Choose one word to the right/left).
- Cmd + Shift + Up/Down – (Choose one line above/below).
- Shift + Home – (Choose all text until the beginning of the current line).
- Shift + End – (Choose all text until the end of the current line).
Windows Keyboard Shortcuts for Manipulating Selected Text
- CTRL + Shift + V – Paste the selected text without any formatting
- CTRL + B – Bold
- CTRL + I – Italics
- CTRL + U – Underline
- CTRL + C – Copy the selected text
- CTRL + X – Cut the selected text
- CTRL + V – Paste the selected text
- CTRL + K – Insert a link
WordPress Shortcut Keys for Gutenberg

Gutenberg is a popular WordPress block editor that lets users appropriately include images, lists, buttons, paragraphs, and other elements in different posts and pages through customizable blocks.
They can benefit from multiple WordPress shortcuts and smartly use the notable block-based editor.
Gutenberg Shortcut Keys for Windows Users
- Ctrl + Shift + , ( Hide or show the settings bar)
- Alt + Shift + O (Open the block navigation menu)
- Alt + Shift + N (Go to the next part of the editor)
- Alt + Shift + P (Go to the previous part of the editor)
- Alt + F10 (Navigate to the nearest toolbar)
- Ctrl + Shift + Alt + M (Switch between Code Editor and Visual Editor)
- CTRL + Shift + ALT + M (users can switch to the code editor or they can go back to the block editor if they are in the code editor already).
- Ctrl + Shift + D – users can duplicate the selected block(s)
- Enter – create a new paragraph block. It helps combine with the / shortcut above to quickly insert multiple blocks.
- Insert Specific Block – Press / (forward slash), write the block name, and press enter.
- Enter (For adding a new block)
- Ctrl + Shift + D (For duplicating the selected block(s))
- Alt + Shift + Z (For removing the selected block(s))
- Ctrl + Alt + T (For inserting a new block before the selected block(s))
- Ctrl + Alt + Y (For inserting a new block after the selected block(s))
- / (For changing the block type once the user adds a new paragraph)
Gutenberg Shortcut Keys for Mac Users
- / – if a user types a slash, they can quickly insert a block using its name. (General Shortcut Key)
- Cmd + Shift + ALT + M—(users can switch to the code editor or return to the block editor if they are already in the code editor).
- Enter – (create a new paragraph block in Mac).
- Insert Specific Block in Mac – Press Command (⌘) + / (forward slash), write the block name, and press enter.
- Command + Shift + D (For duplicating the selected block(s))
- Control + Option + Z (For removing the selected block(s))
- Command + Option + T (For inserting a new block before the selected block(s)).
- Command + Option + Y (For inserting a new block after the selected block(s))
- Esc (For clearing selection)
- Command + Shift + Z (Redo your last undo)
- Command + Shift + , (Hide or show the settings bar)
- Option + Control + O (For opening the block navigation menu)
- Option + Control + N (Go to the next part of the editor)
- Option + Control + P (Go to the previous part of the editor
- Fn + Option + F10 (For navigating to the nearest toolbar)
- Command + Option + Shift + M ( For switching between Visual and Code Editor)
What Do You Know About WordPress Formatting Shortcuts?
WordPress formatting shortcuts don’t work the same way as keyboard shortcuts. However, the good thing is that the impact remains the same. Consider them an alternative to a few keyboard shortcuts explained above.
Formatting shortcuts are a crucial feature of WordPress 4.3. Using these shortcuts, you can add formatting instantly for headings, horizontal lines, ordered or unordered lists, and blockquotes.
For users’ convenience, we have described WordPress formatting shortcuts below:
- * – (Begins an unordered or bulleted list with a bullet point like square, dot, and circle ).
- 1. – (Starts an ordered or numbered list with a sequential number like 1,2,3, and so on).
- ## – (Implements H2 formatting).
- ### – (Implements H3 formatting; you can follow the same pattern to implement up to H6 formatting).
- > – (It helps users create a blockquote).
- — – (It allows users to create a horizontal line).
Note: Remember to hit Enter or Space once you type any shortcut when implementing formatting. You must also use the visual tab to implement these shortcuts effectively.
What Do You Mean By WordPress Tags?

WordPress tags describe the context of blog posts and articles. You can perceive them as keywords explaining numerous content types, such as articles, blog posts, etc.
Tags are usually placed at the bottom of blog posts but can also be placed in the sidebar. When managing website content, tags help users a lot. They greatly influence SEO and user experience, making websites user-centric and highly optimized.
WordPress Tags Shortcuts
WordPress tags shortcuts are divided into different tags, such as comment tags, post tags, navigation tags, permalink tags, edit link tags, login/logout tags, post thumbnail tags, query tags, conditional tags, and more.
Comment Tags
- get_avatar();
- comment_ID();
- comment_type();
- comment_time();
- comment_text();
- comment_form();
- comment_date();
- comment_link();
- comment_author();
- comment_class();
Post Tags
- the_time();
- the_date();
- the_meta();
- the_title();
- post_class();
- body_class();
- sticky_class();
Navigation Menu Tags
- wp_nav_menu();
- wp_get_nav_menu();
- wp_get_nav_menu_item();
Classic WordPress Editor Keyboard Shortcuts for Windows and Mac
(For Windows):
- Alt + Shift + [number] = Apply heading sizes, for instance Alt + Shift + 1 = <h1>, Alt + Shift + 2 = <h2>.
- Alt + Shift + U = Bulleted List
- Alt + Shift + A or Ctrl + K = Insert link
- Alt + Shift + I = Align Left
- Alt + Shift + J = Justify Text
- Alt + Shift + C = Align Center
- Alt + Shift + D = Strikethrough
- Alt + Shift + R = Align Right
- Alt + Shift + O = Numbered List
- Alt + Shift + S = Remove link
- Alt + Shift + Q = Quote
- Alt + Shift + M = Insert Image
- Alt + Shift + T = Insert More Tag
- Alt + Shift + P = Insert Page Break tag
- Alt + Shift + W = Fullscreen, distraction-free writing mode in visual editor mode
- Alt + Shift + Z = Toolbar toggle
(For Mac):
- Command + Option + R = Align Right
- Command + Option + U = Unordered List
- Command + Option + A = Insert link
- Command + Option + O = Numbered List
- Command + Y = Redo
- Command + Option + S = Remove link
- Command + Option + Q = Quote
- Command + Option + M = Insert Image
- Command + Option + T = Insert More Tag
- Command + Option + P = Insert Page Break tag
- Command + Option + W = Fullscreen, distraction-free writing mode in visual editor mode
- Command + Option + F = Fullscreen, distraction-free writing in plain text mode
Other Useful Windows WordPress Editor Shortcuts
Fortunately, you have so many options when using Windows WordPress editor shortcuts. Here are these influential WordPress Windows shortcuts described below:
- CTRL + Z – (Undo)
- CTRL + Y – (Redo)
- ALT + Shift + M – (It helps users open the Add Media screen).
- ALT + Shift + W – (Enables Distraction Free Writing mode).
- ALT + Shift + T – (Inserts a More tag).
- ALT + Shift + P – (It allows users to insert a page break)
- ALT + Shift + H – (Opens the help screen).
- ALT + Shift + Z – (Expands the WordPress Editor formatting bar).
- Shift + Enter – Move down one line in the editor without inserting a full line break.
Do You Need Professional Help?
ThemeFuze does offer small and large businesses impactful yet results-driven WordPress page builder services according to their official needs.
This way, businesses of different sizes with varied target audiences can create and edit their websites’ layouts without deploying any code.
Wrapping Up
We expect you to appreciate our informative blog post highlighting the significance of WordPress shortcuts. In this era of advancement and customization, WordPress keyboard shortcuts have become the need of the hour.
These valuable shortcuts and tricks will save users ample time and resources, enabling aspiring WordPress developers and website designers to focus on other crucial attributes like website content, UI and UX elements, and more.