One of the most crucial maintenance tasks for WordPress websites is to regularly create or schedule backups. Your website is constantly at risk from individuals who seek to exploit the internet. Additionally, updates, plugin failures, and compatibility issues can all potentially cause your website to crash, resulting in the loss of valuable data.
Having a backup is an essential fail-safe mechanism that allows you to easily restore your website to its previous fully-functional state.
In this article, we will guide you on how to easily backup a WordPress website.
Step 1. Choose a backup plugin
WordPress core does not come with a built-in backup system, so it is necessary to install a backup plugin on your website.There are several reliable backup plugins available, both free and paid options. Some of the top choices include WPvivid, UpdraftPlus, All-In-One WP Migration, and BackupBuddy.
We highly recommend WPvivid for our sites and to our users. This user-friendly plugin offers automatic and manual backups, with both free and premium versions available. It is suitable for websites of all sizes.
For the purpose of demonstrating the backup process, we will be using WPvivid. However, please note that other plugins follow a similar approach for backing up your website.
Step 2. Install the Backup Plugin ‘WPvivid’
To improve the copy for the content, consider the following revised version: To get started, access your website’s admin dashboard. From there, navigate to the “Plugins” section and click on “Add New”. Next, search for the ‘WPvivid’ plugin and proceed to install and activate it.
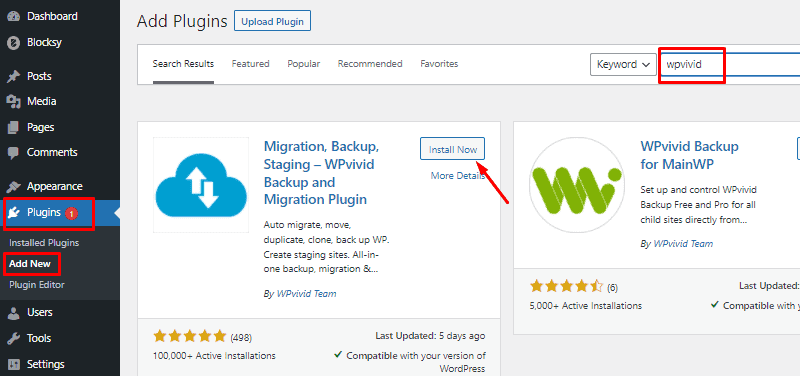
If you require detailed instructions on how to install a WordPress plugin, we recommend reading our comprehensive article on the topic.
Once you have successfully activated WPvivid, you will find the WPvivid plugin menu accessible.
Step 3. Create Manual Backup
To improve the copy, consider the following revised version:To begin the manual backup process, navigate to the Backup & Restore screen under the WPvivid menu.
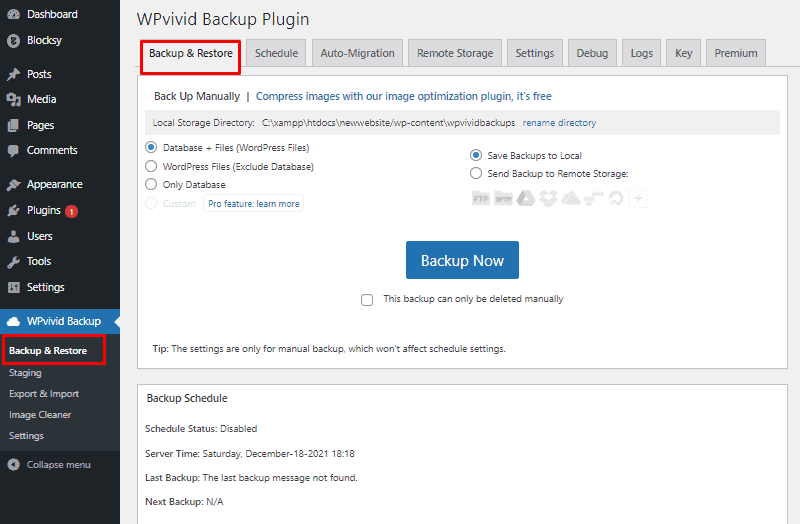
Next, you’ll need to choose two parameters: what to backup and where to save the backup.
For a complete backup, select Database + Files on the left side. On the right side, choose ‘Select Backups to Local’ to save the backup to your website’s hosting server.
Once you have selected both parameters, click on the Backup Now button to start the backup process.
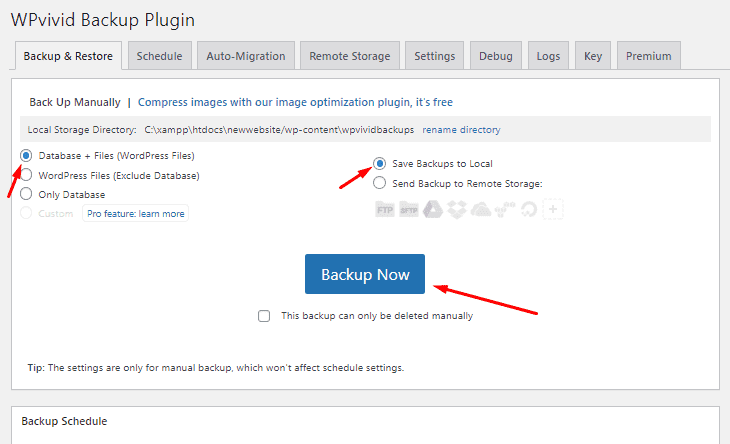
With that, the backup process will start and take a while depending on your website’s size.
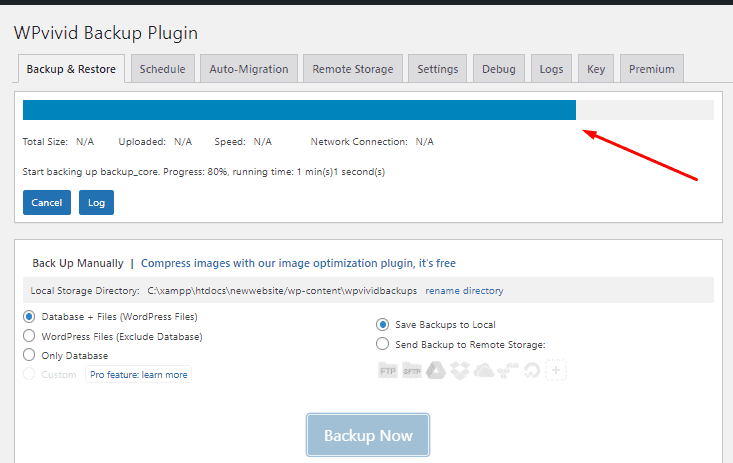
Here’s an improved version of the copy for the content:”Once you have finished manually backing up your website, you can find the current backup details by scrolling down below. From there, you will have the option to delete the backup, download it to your PC, or restore it.”
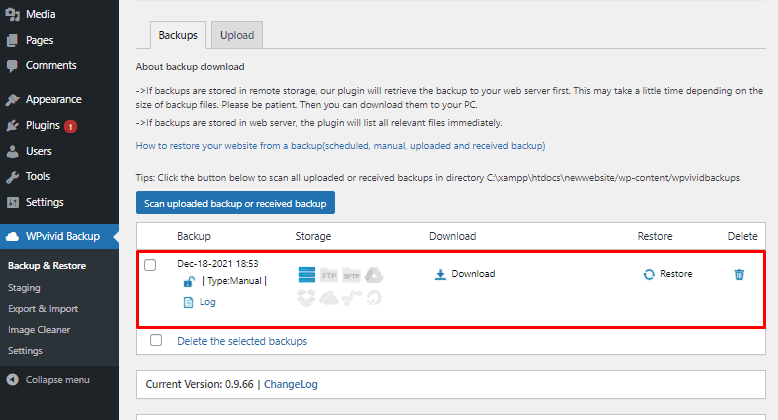
In addition, if you prefer to choose an alternative backup location, you can effortlessly connect to various services such as Google Drive, Dropbox, OneDrive, and more through the Remote Storage tab.
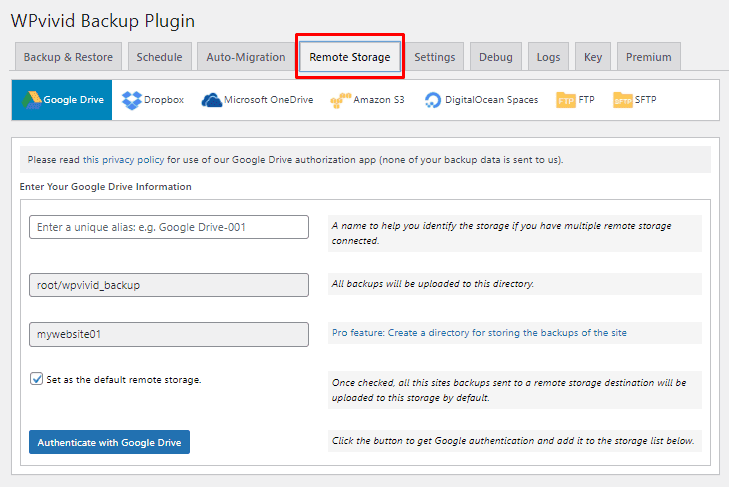
Step 4. Set up Backup Scheduling
WPvivid offers an automated backup feature that effortlessly handles website backups without any manual intervention. With just a simple setup, you can schedule backups at your convenience. To get started, navigate to the Schedule tab.
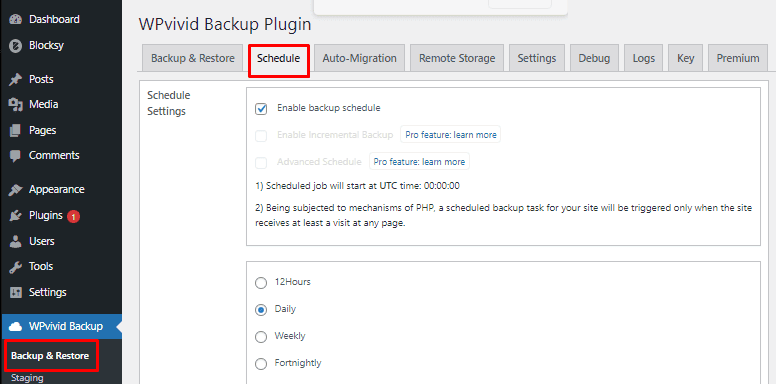
From there, you have to set the schedule settings. It includes the following –
- Backup Interval – Choose the time interval between 2 consecutive backups.
- Backup document – Choose what to save – data, database, or both.
- Backup location – Select local backup or remote storage (if you have verified any).
After selecting everything according to your preferences, click on the Save Changes button below.
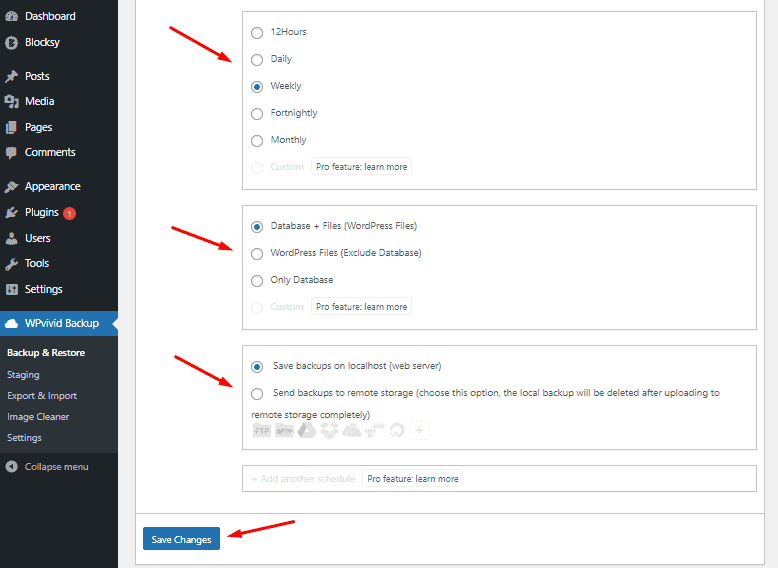
After that, the automatic backup schedule will be active.